
Playing Synth or Pads with your BRIDGE
Learn how to quickly setup triggers for 'drone pads' or chords on your BRIDGE controller
The finished product of this tutorial is now available as a template you can load in our Web Editor. The tutorial is still useful for the sake of understanding how the template works, and to spark creative ideas for other application of the same features.
So, I can play chords with my feet?
Yeah, exactly! If you have a synth or plugin that can be controlled by an external MIDI controller, then we can set up some simple notes to send with the footswitches on the BRIDGE6 or BRIDGE4 foot controller.
If you want to use an app or plugin, make sure you're setting the MIDI messages to be sent to the USB MIDI out. If you're using a hardware synth connected to the BRIDGE via DIN5 or TRS cable, make sure that the appropriate MIDI out is selected for each message. If you don't understand, you can watch this video, the come back here to continue.
To make sure we don't have two different chords playing at the same time, we'll use the brand new Switch Groups feature to automatically turn off all other switches when we choose a switch and press it.
We're going to use the PIRATE MIDI Wed Editor for this tutorial, but all the features of the BRIDGE6 can be changed and set in the onboard menus, so you're never stuck if you're on the road without a computer or web access.
Step 1: Labels
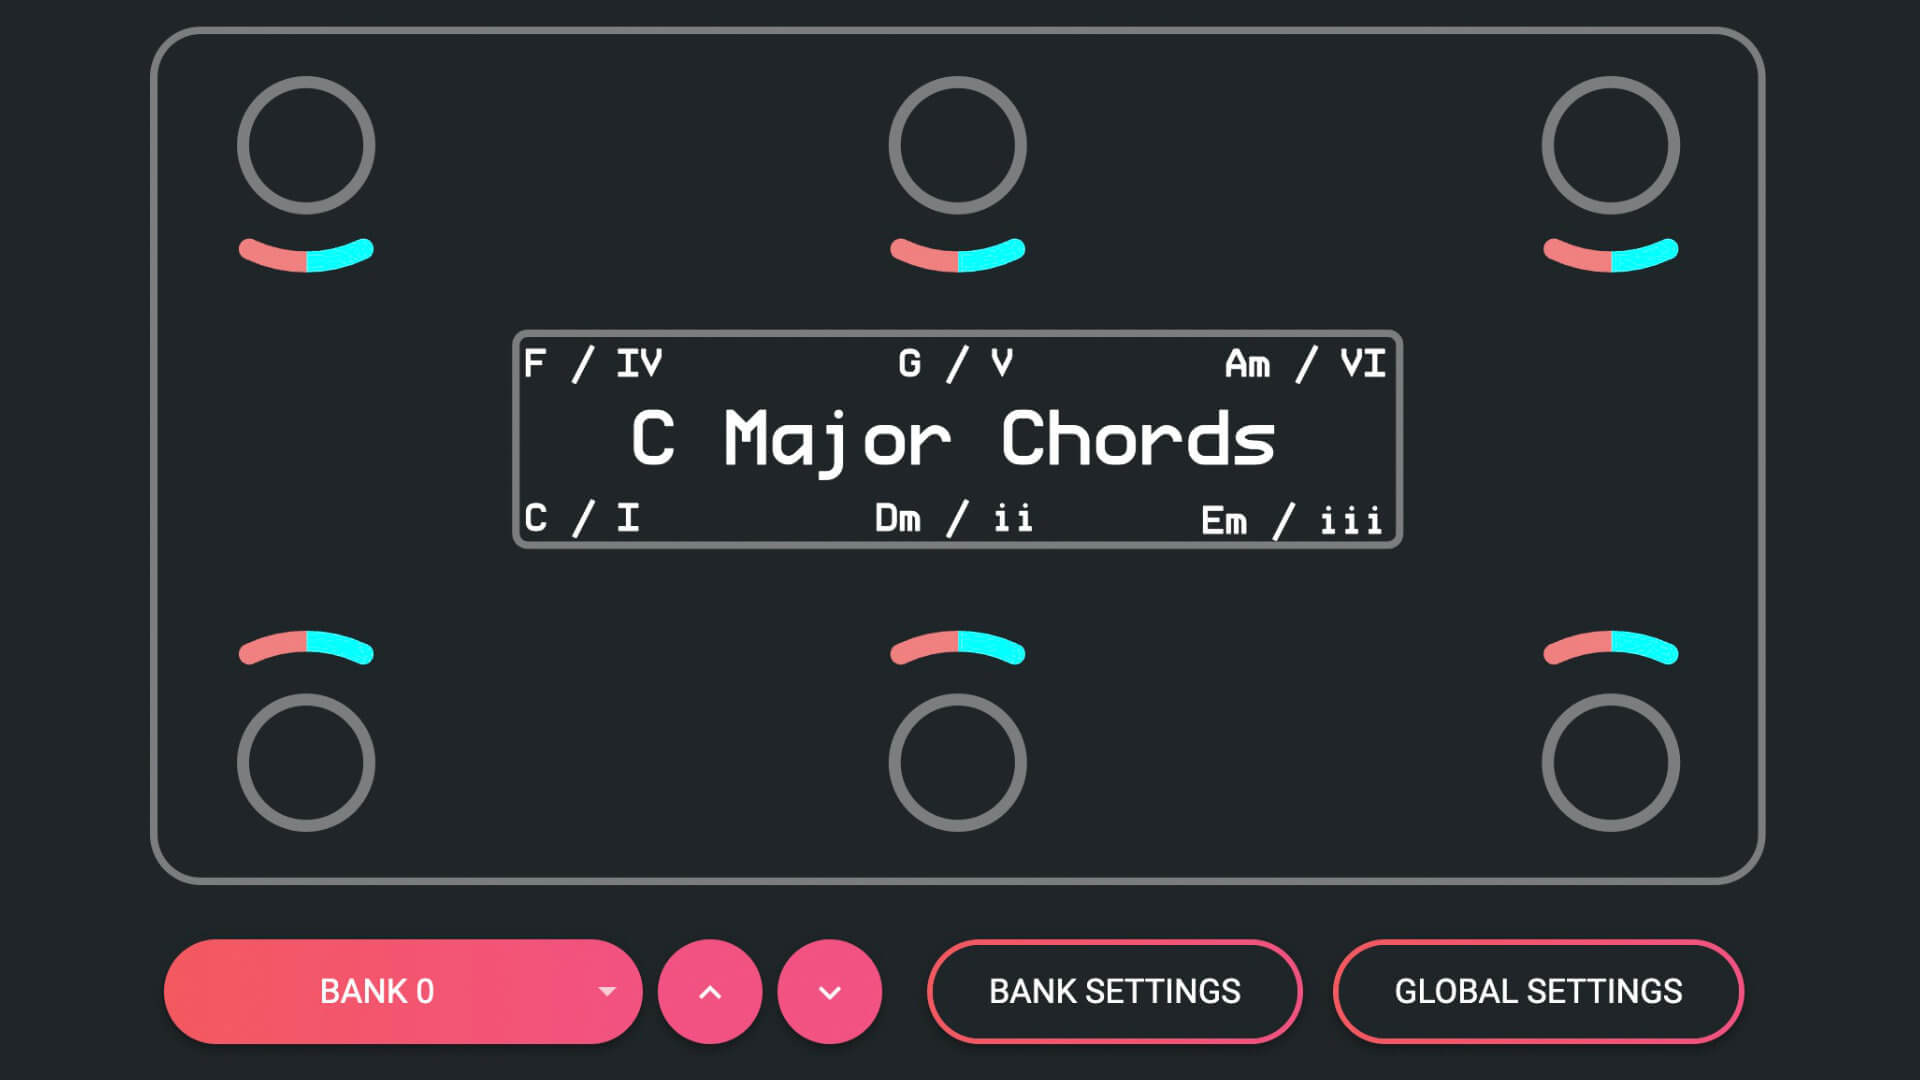
Let's create the labels so we don't get lost. You can add all the primary and secondary switches on each bank of a BRIDGE4 (8) or BRIDGE6 (12) to a group. For the sake of simplicity, we're going to use the 6 primary switches on the BRIDGE6 for this example, and we're going to create chords in the key of C major. C maj, D min, E min, F maj, G maj, A min. We're missing B dim, and you could add that to a secondary switch if you wanted, but we're just 4 chord junkies over here anyway ;)
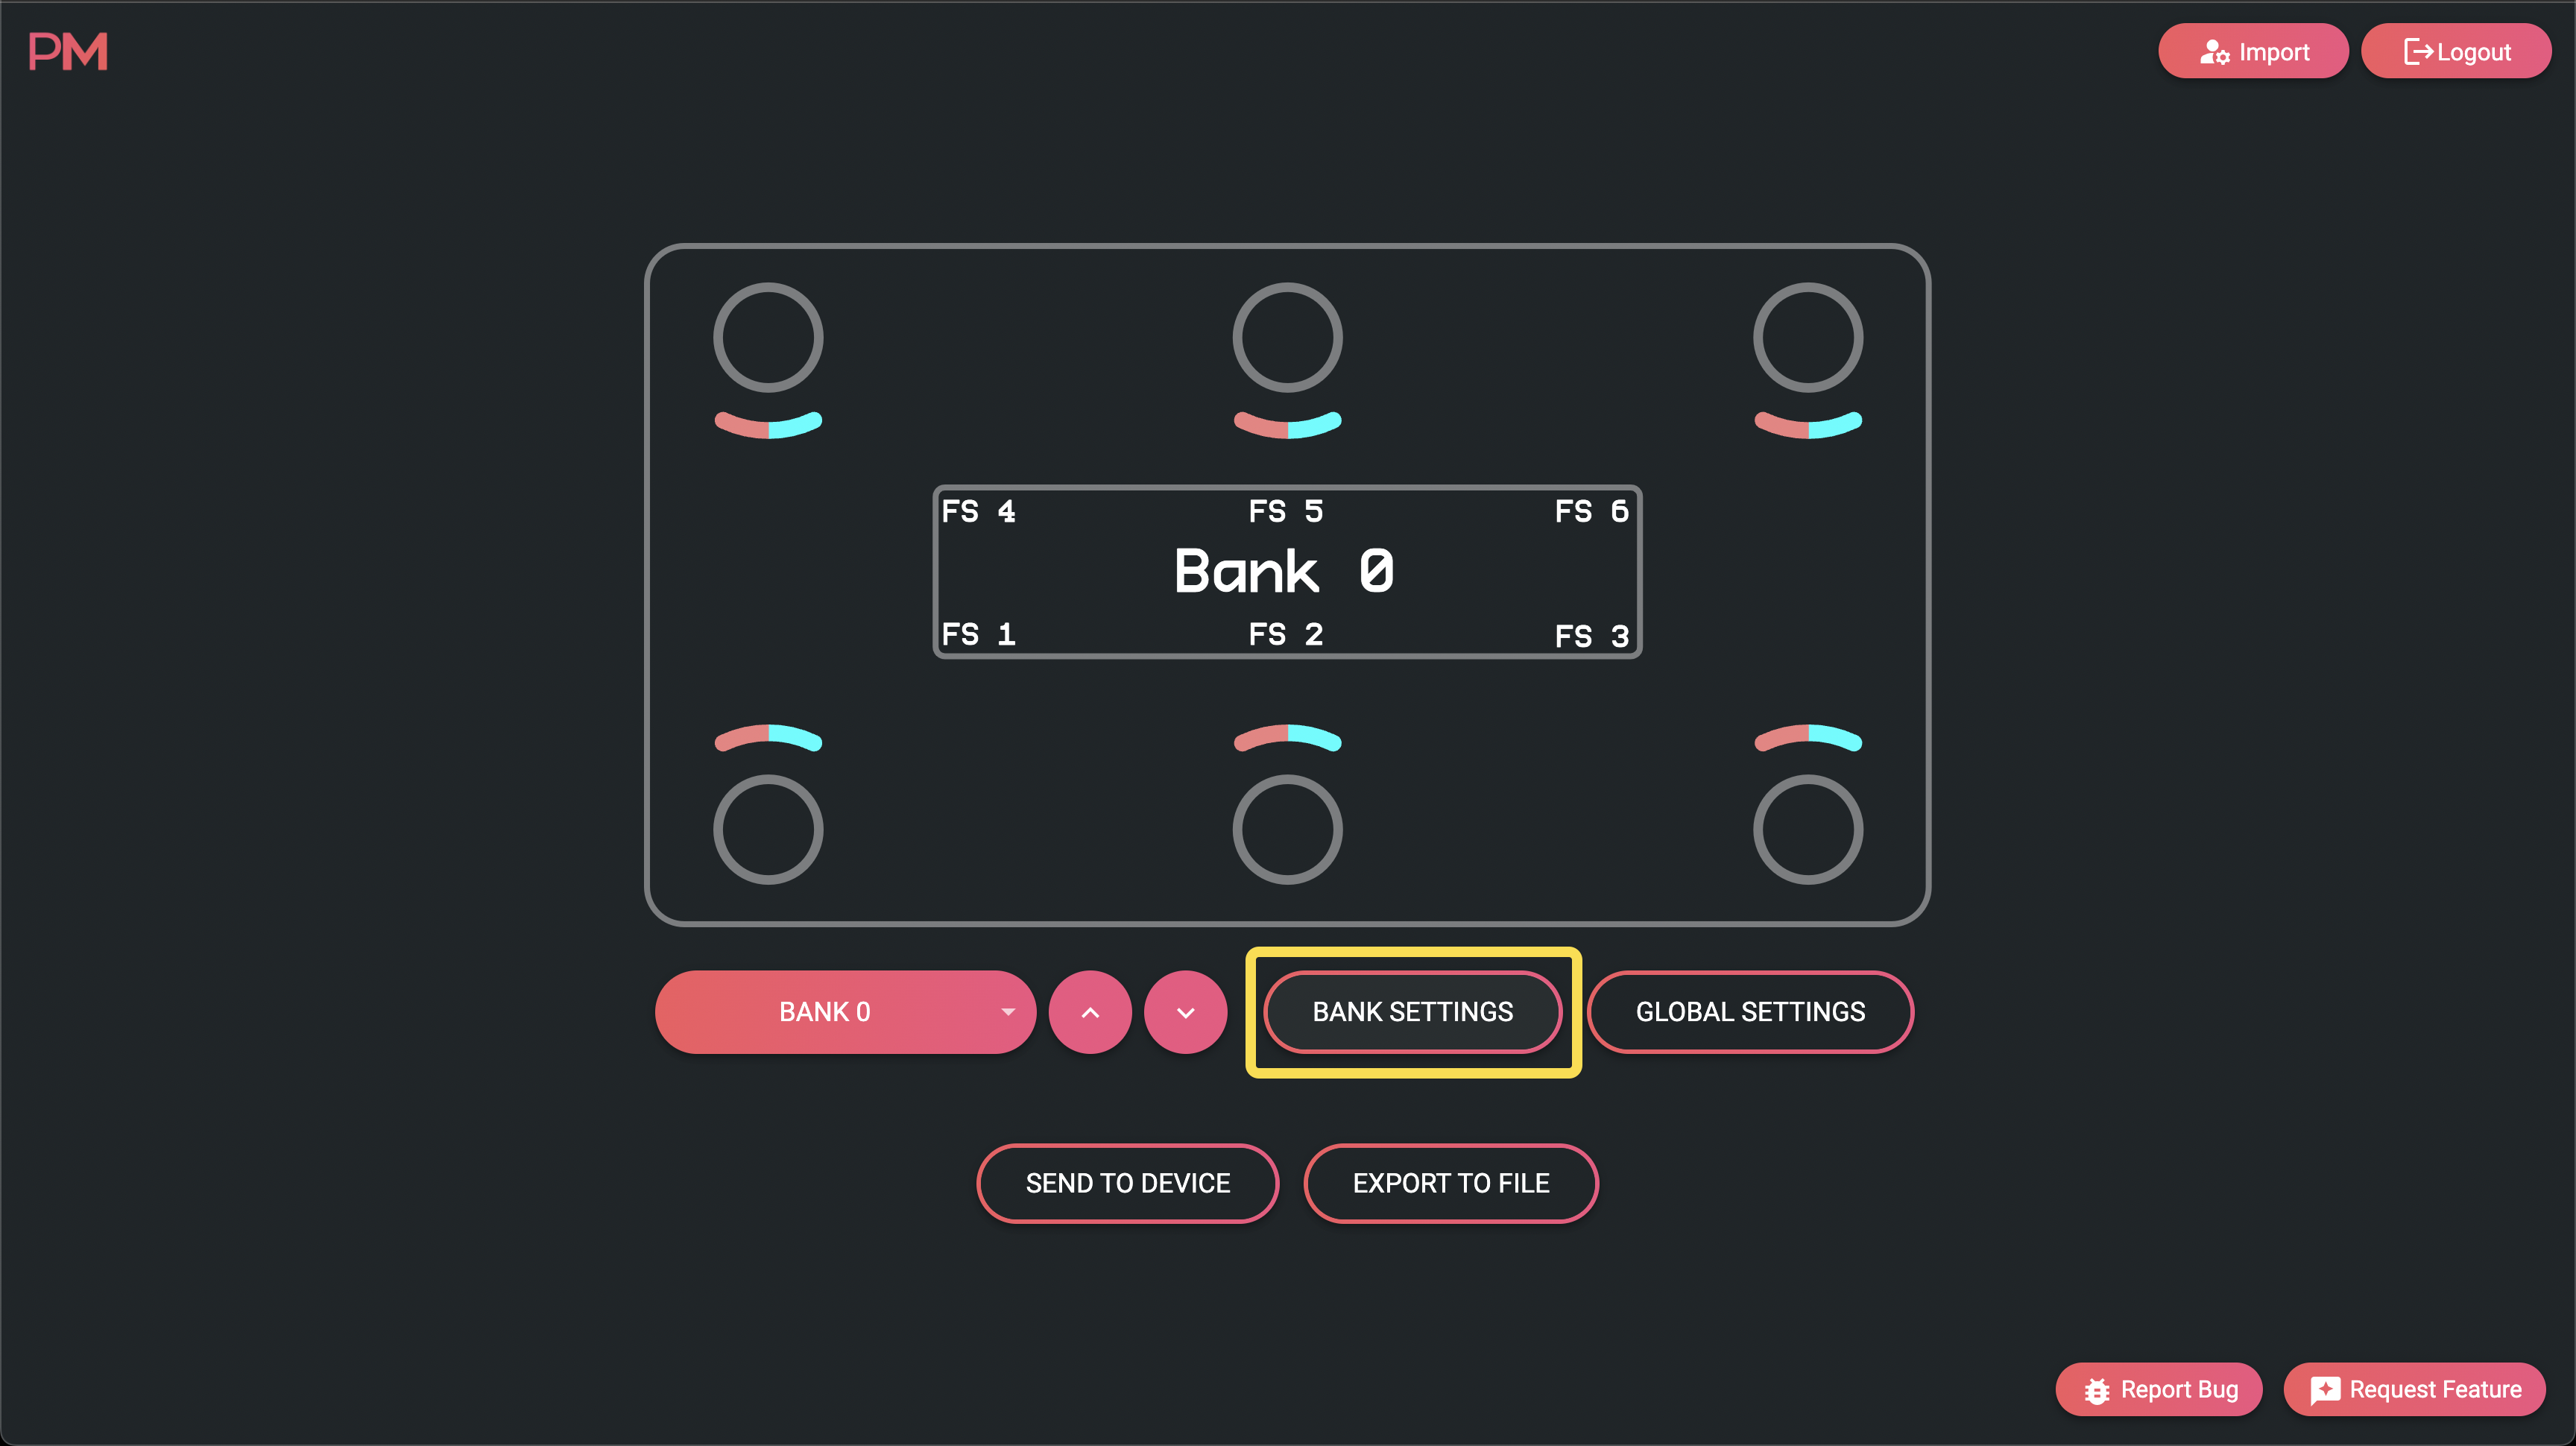
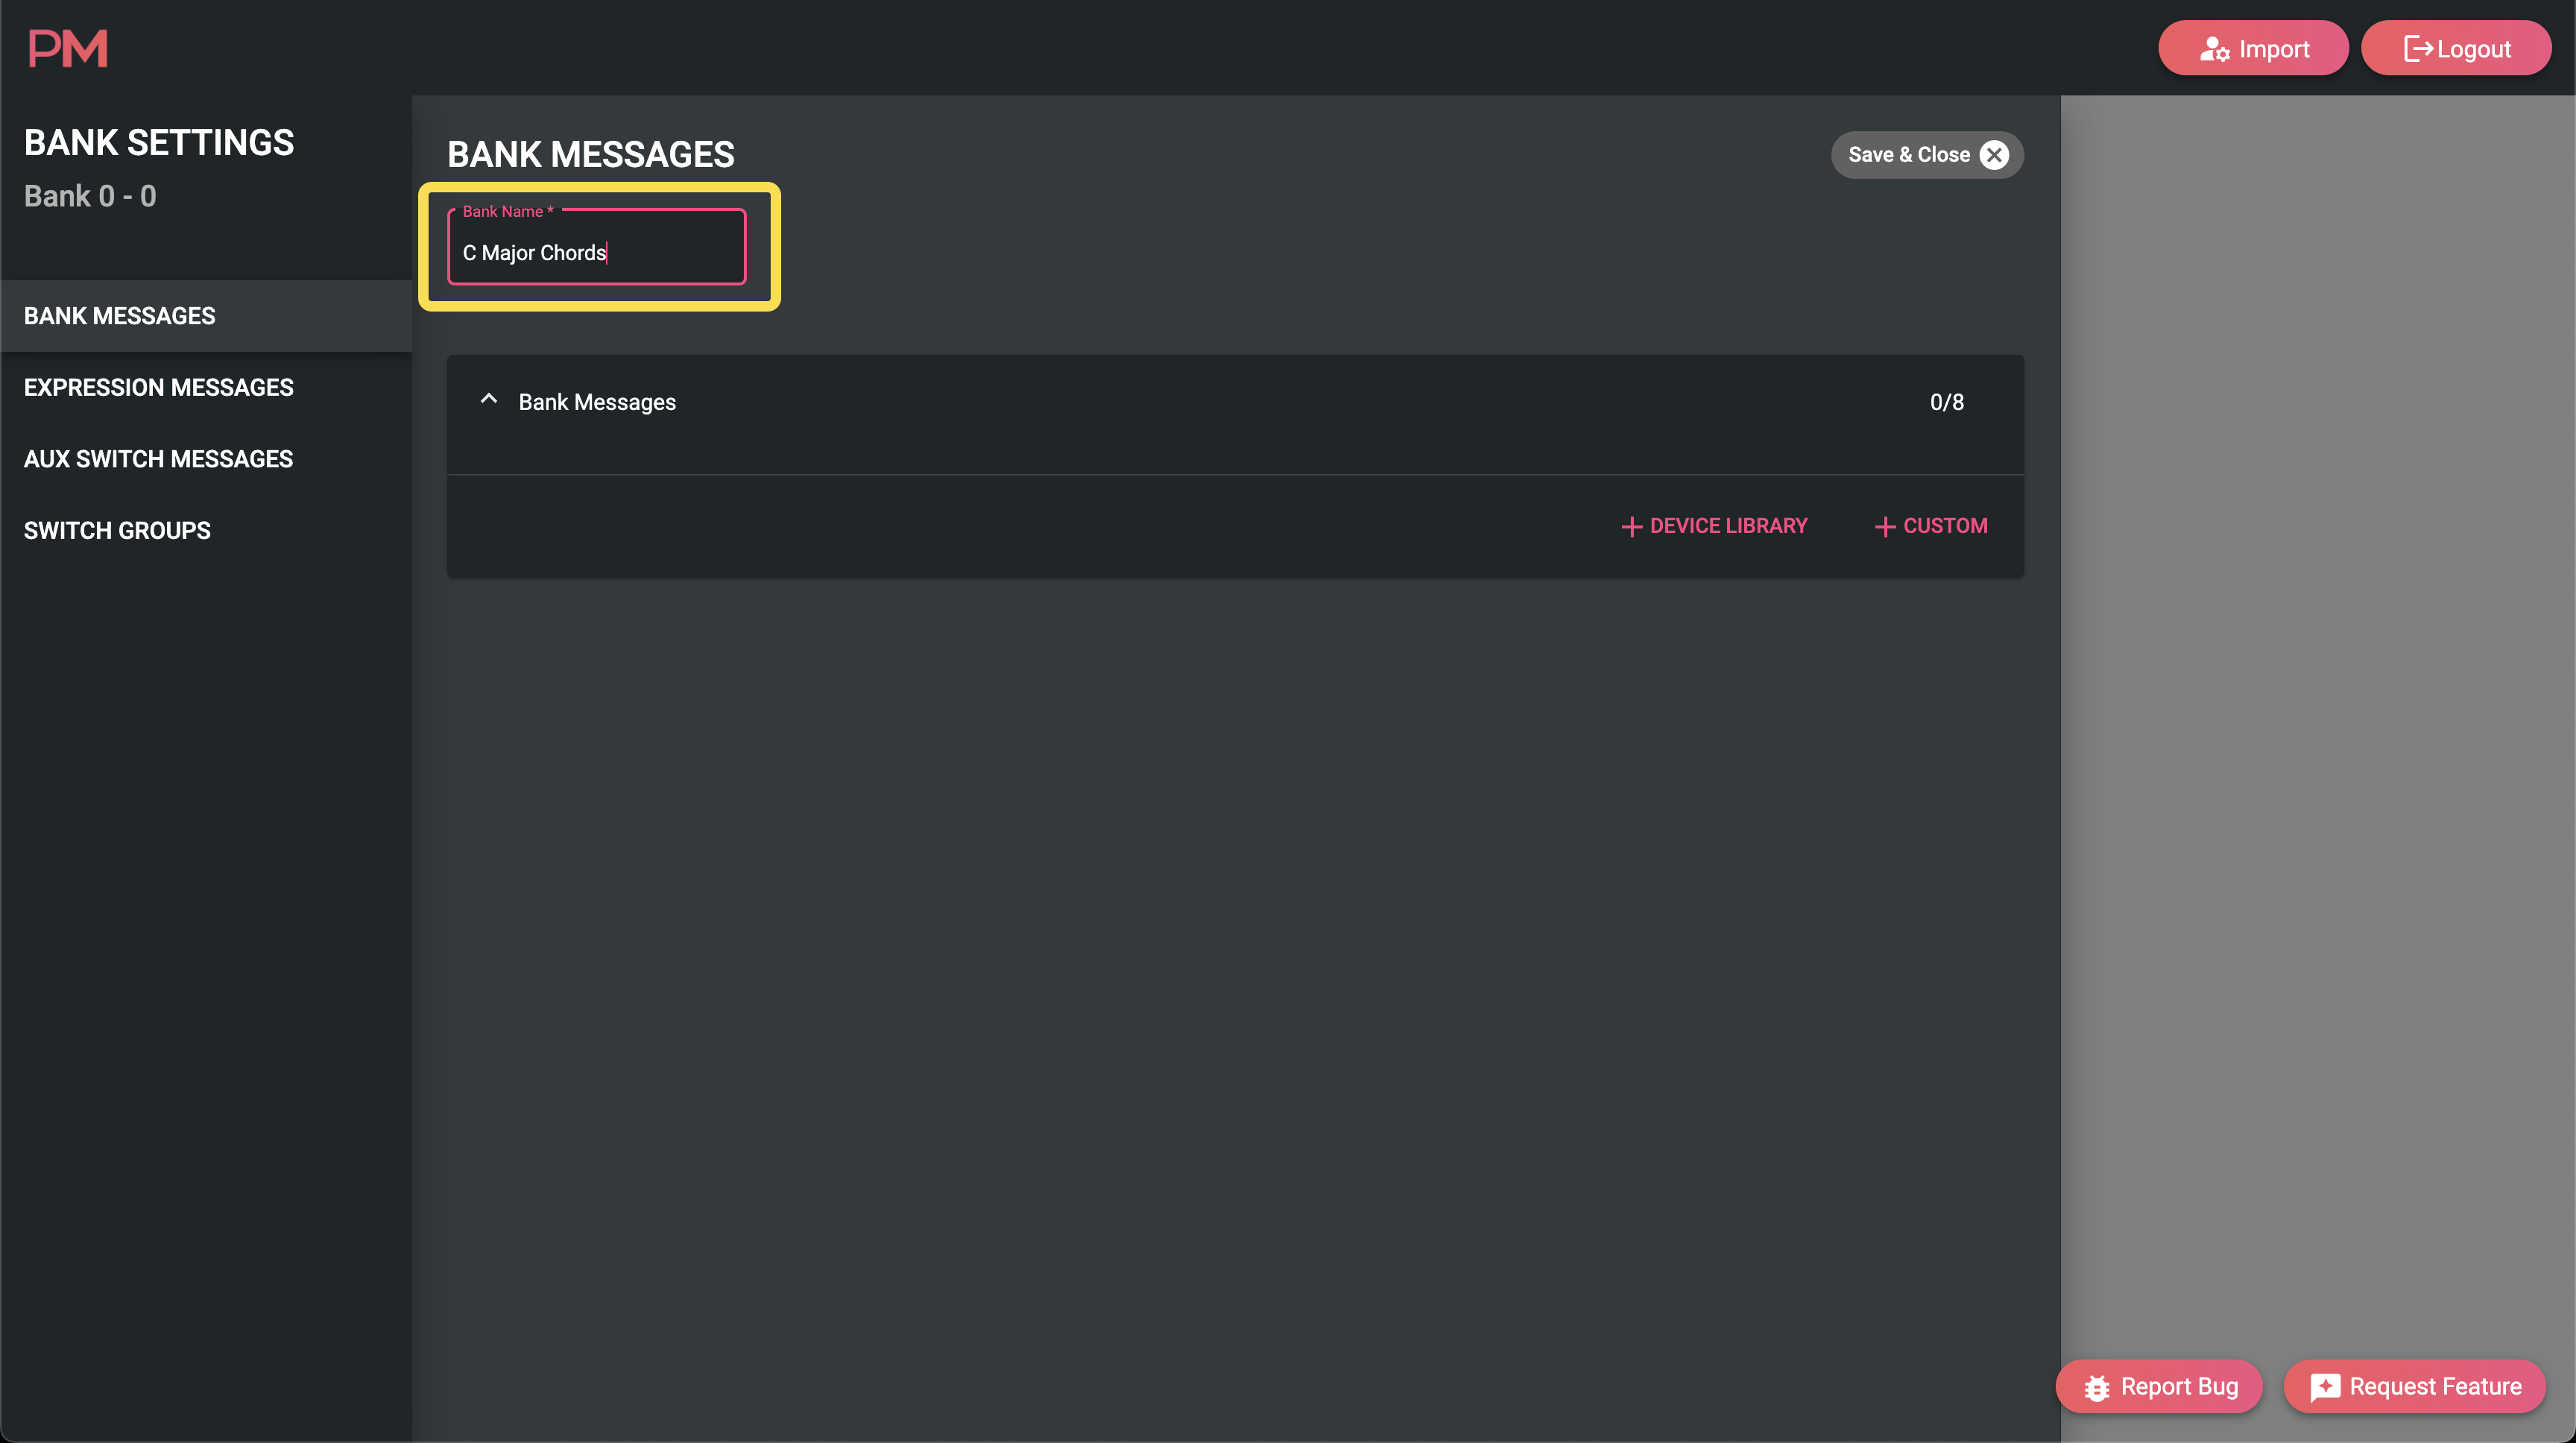
Setting the bank name in the "Bank Settings" menu is as easy as clicking, and typing.

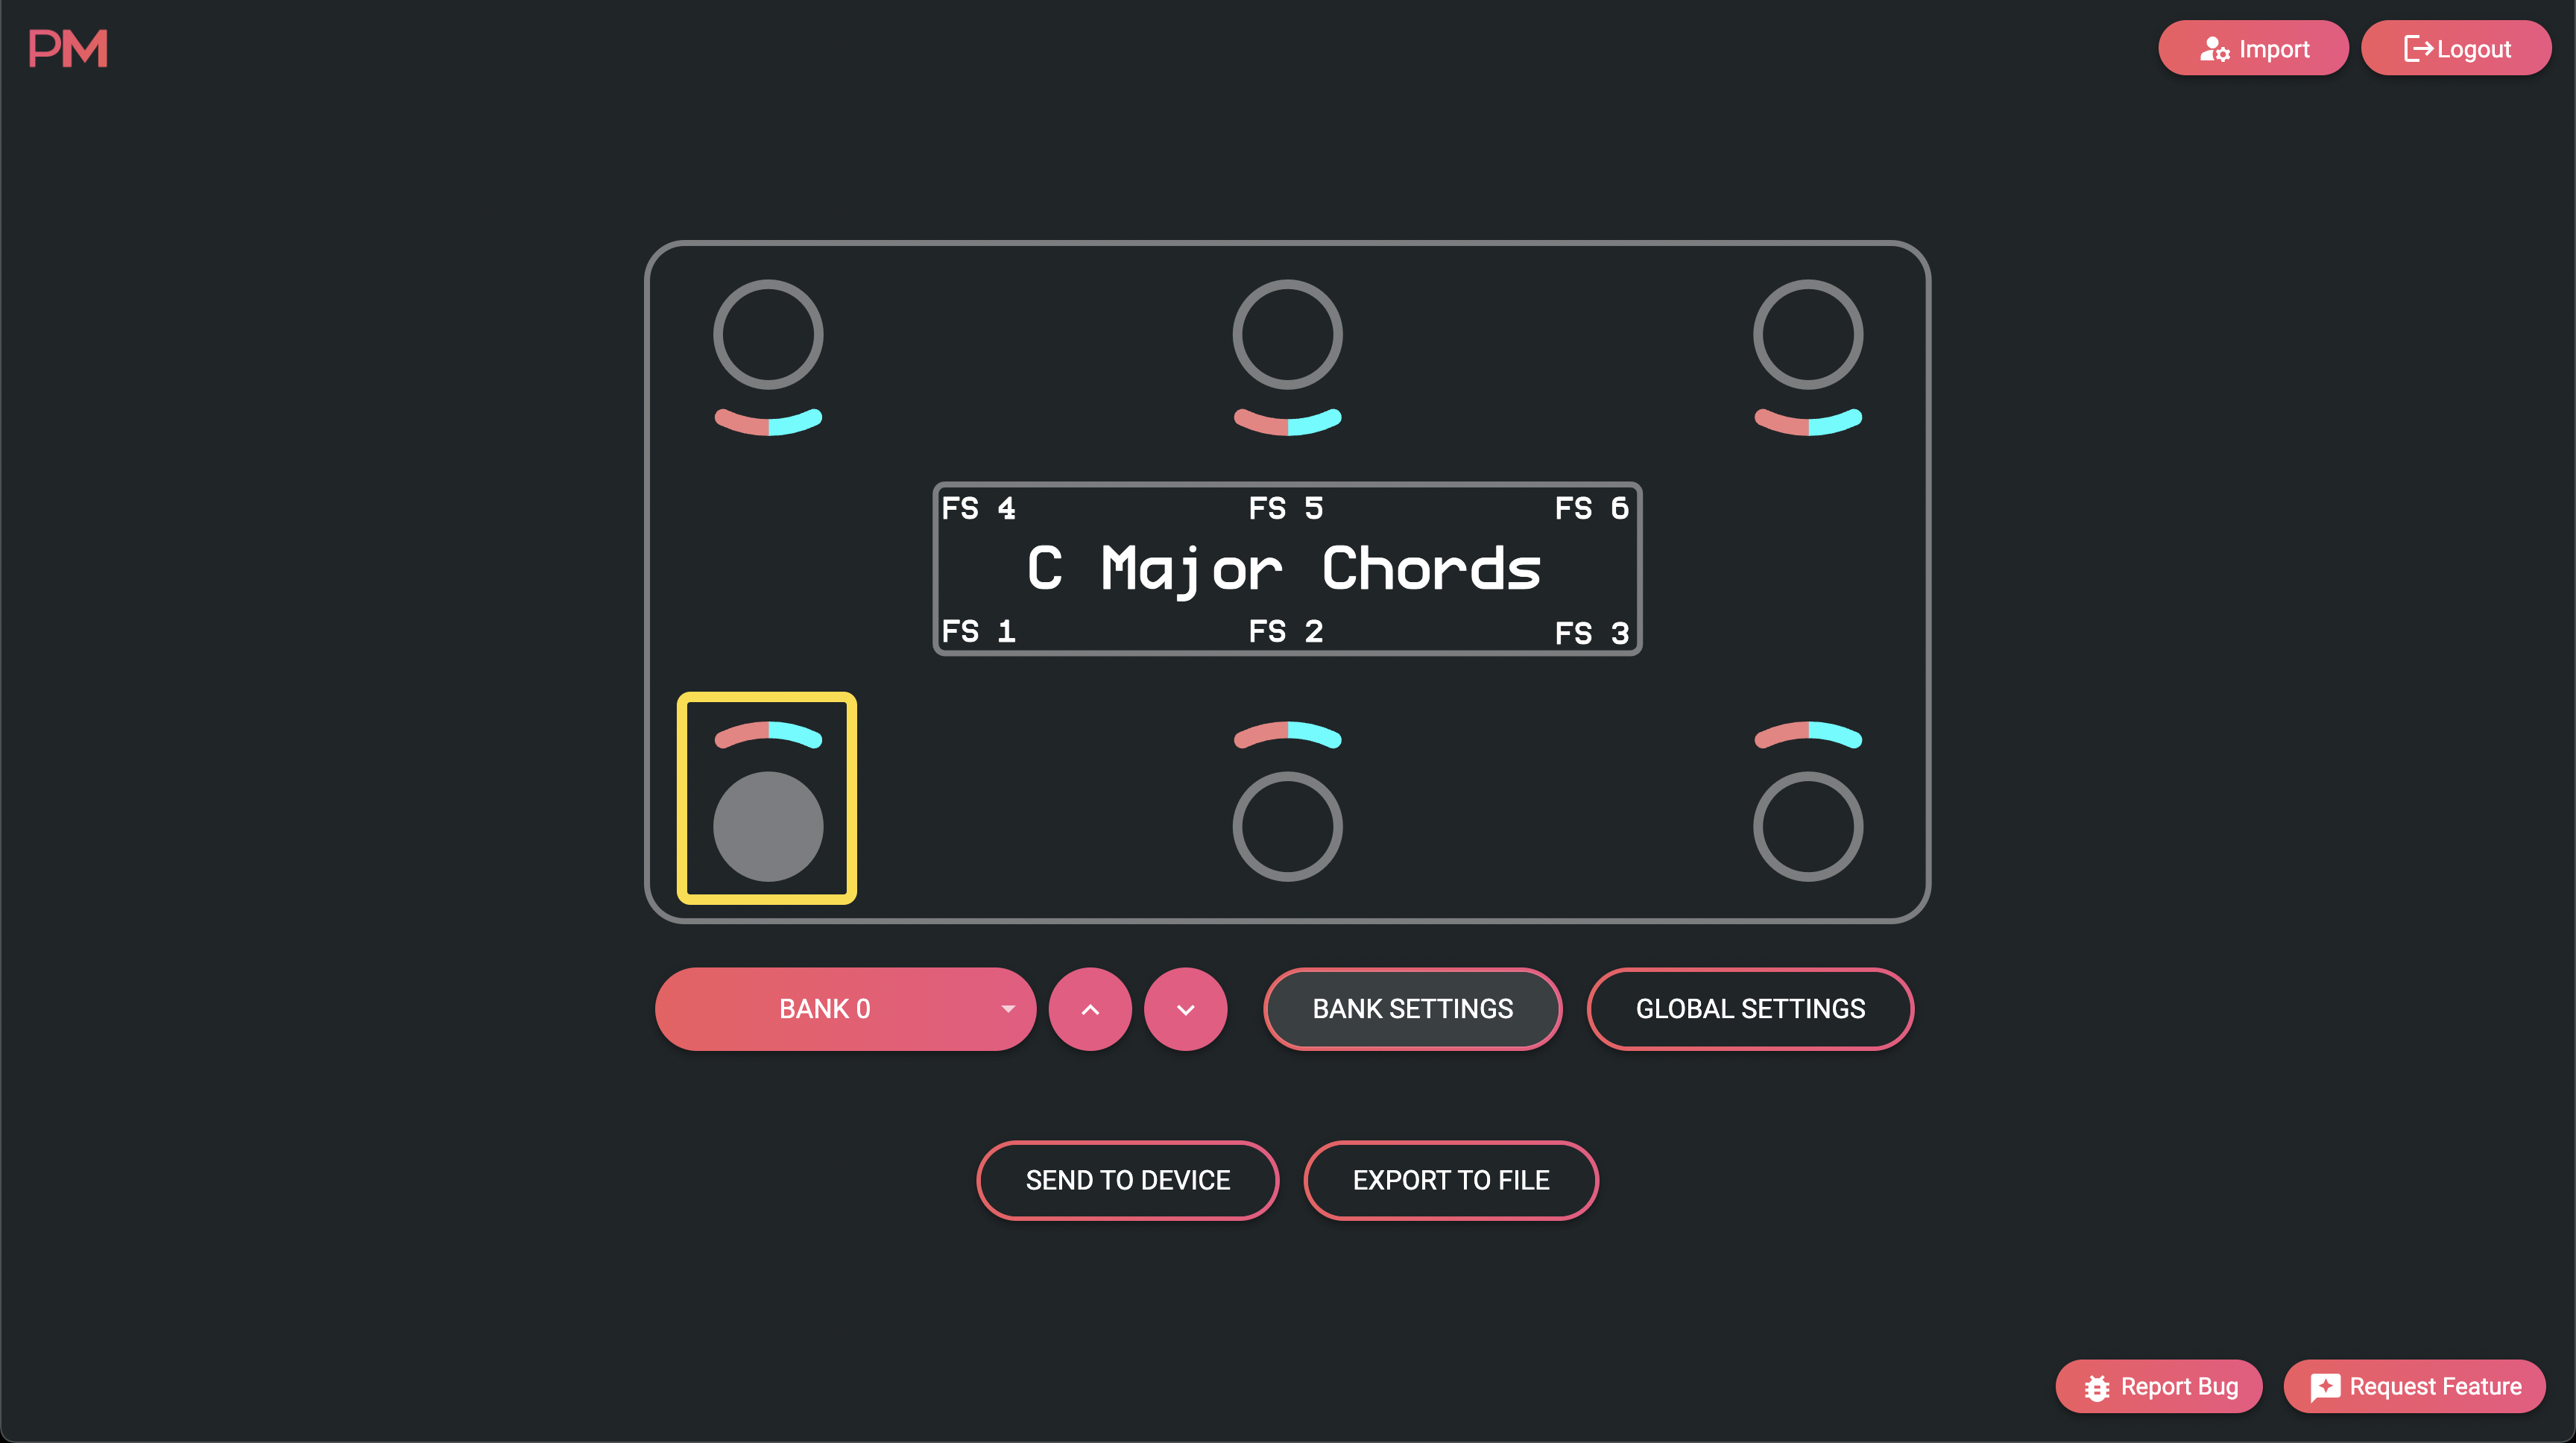
For the Switch Names (Scribble Strips, as some call them), click on Footswitch 1 on the pedal outline, then change the switch name in the same manner as the bank name. Rather than closing this menu and clicking on the next switch, just use the "Next Switch" button in the bottom right of the switch settings menu page.
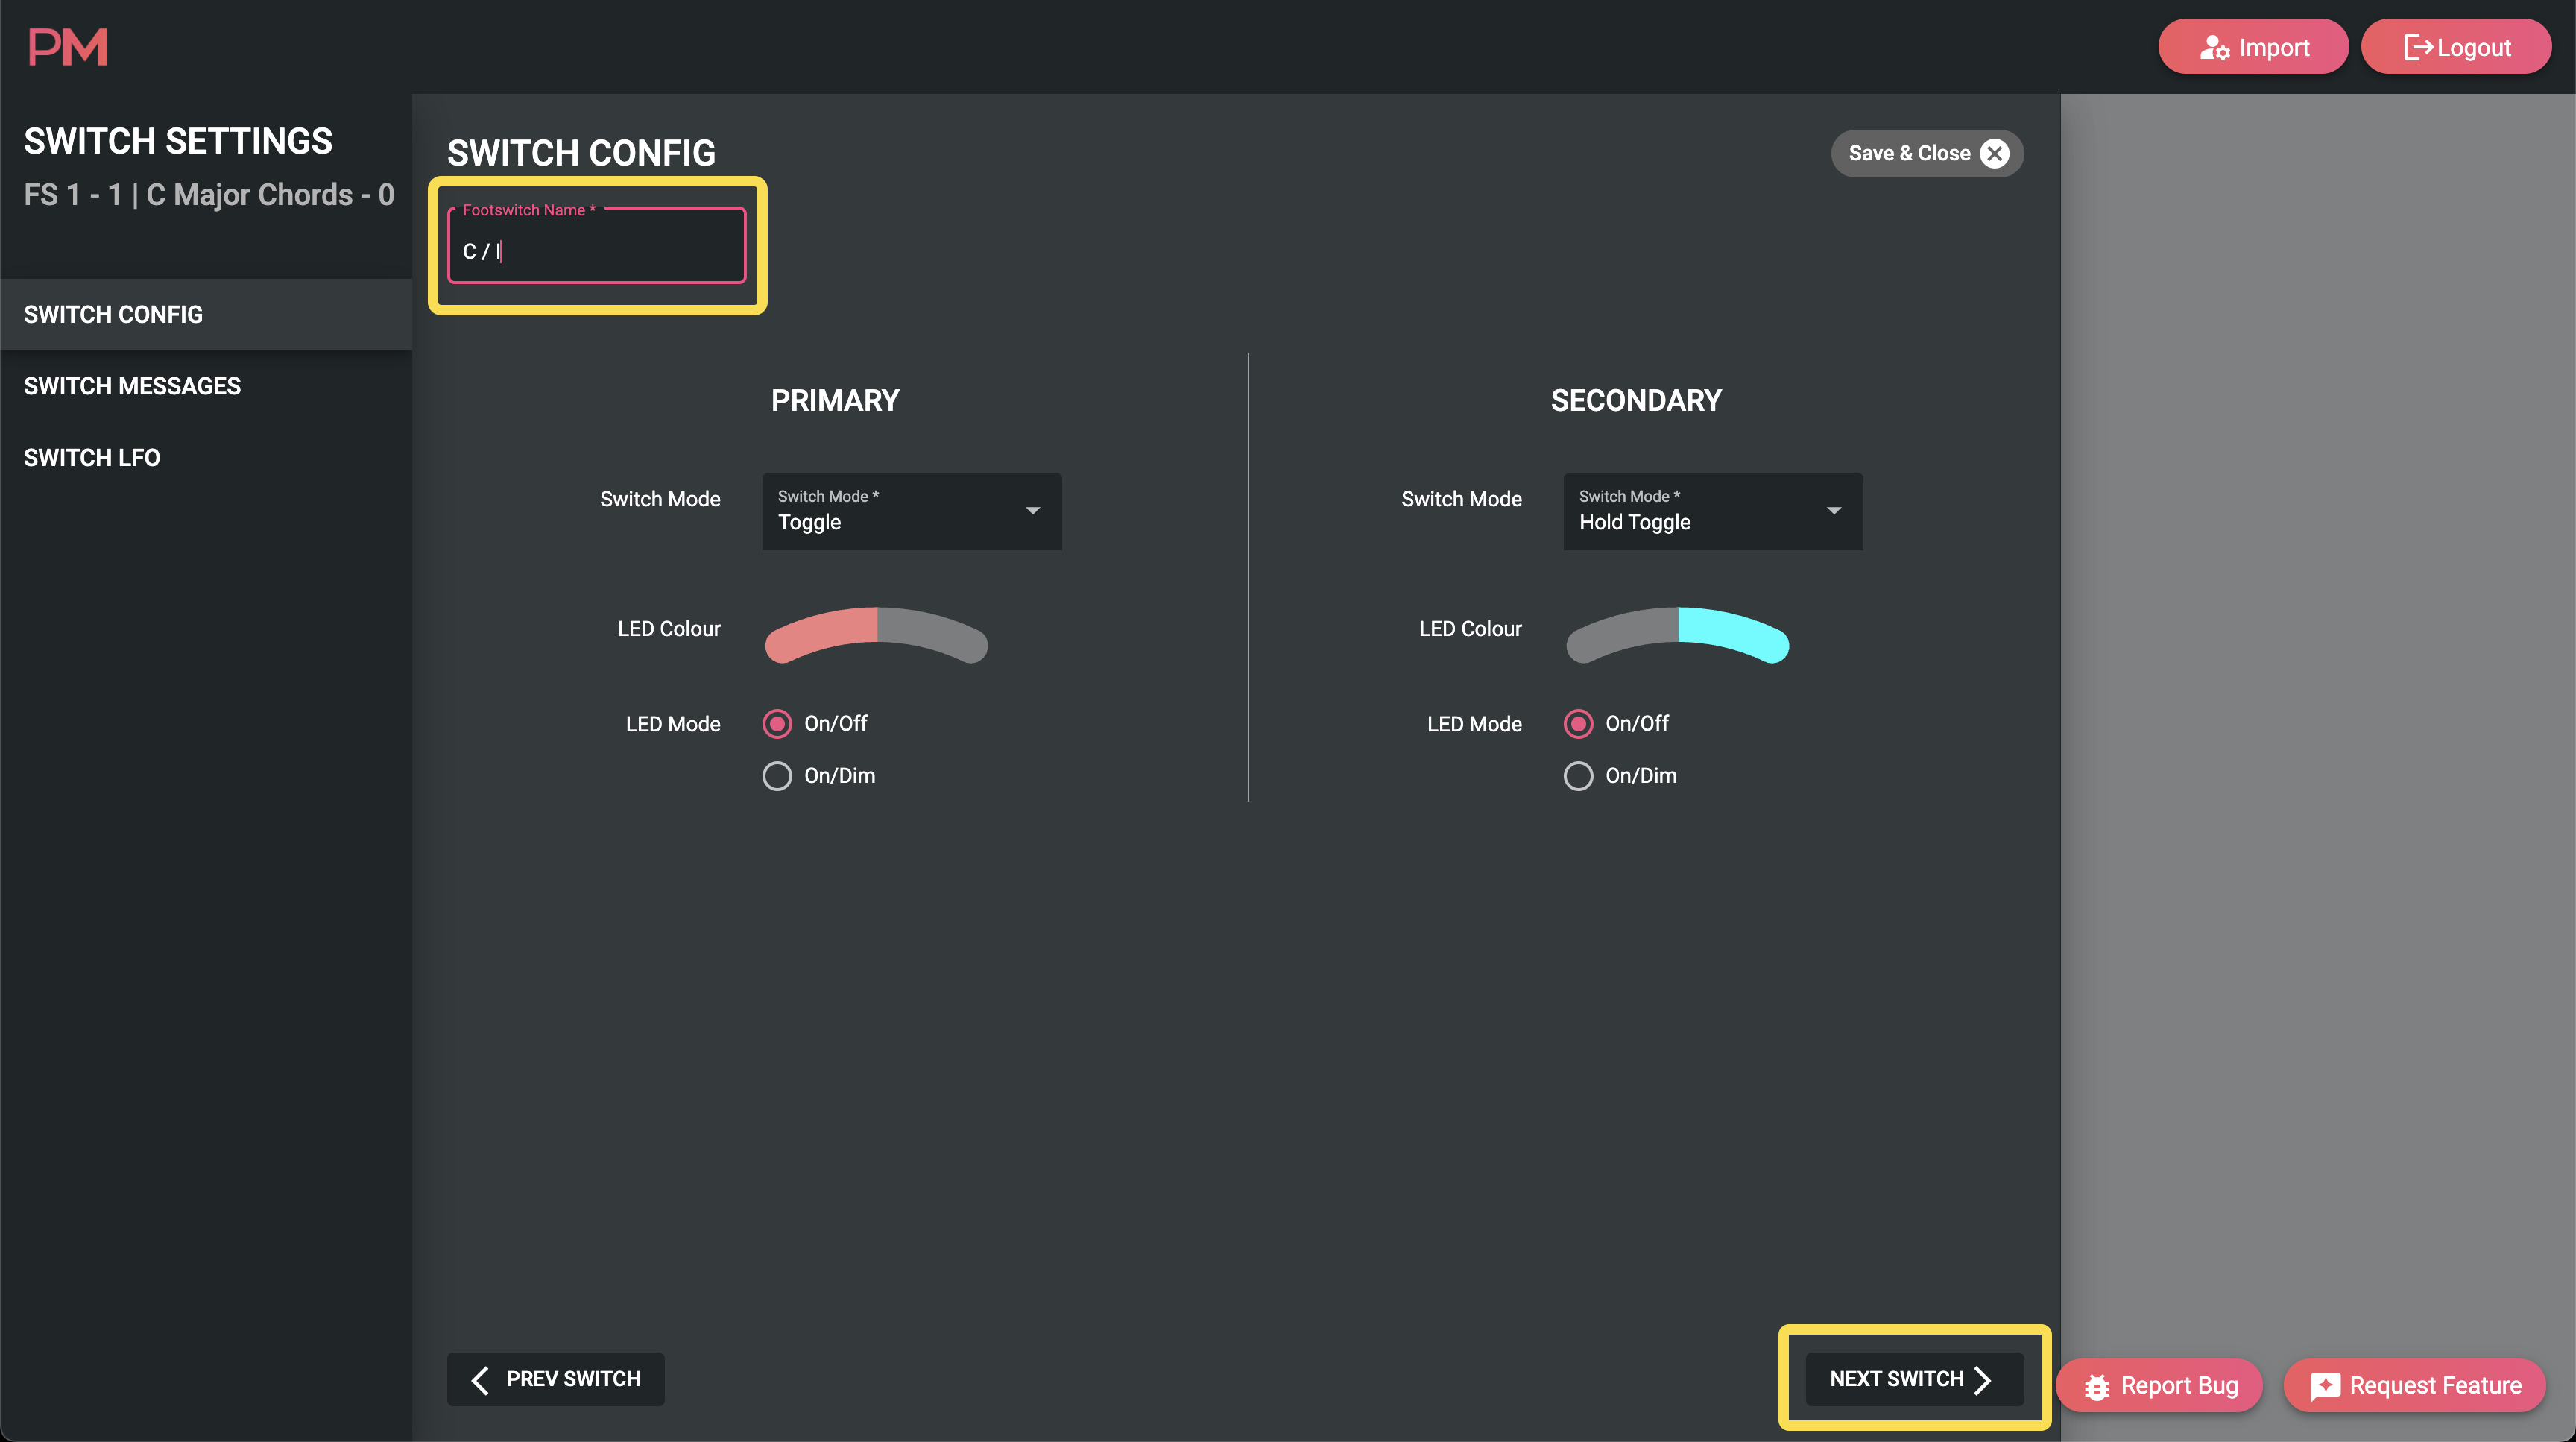
As you can see below, we've named our chords using the Roman numerals as well as the letters.

Step 2: Switch Groups
Now we'll get the switches interacting with each other the way we want. For this we'll use the Switch Groups in Bank Settings. Switch Groups allows switches to react to changes in state of other switches. And each switch in the group can be told to react in a different way to the others. For this we have a few settings: Transmit, Receive, Respond To, and Response. If you don't want the switches to control each other (i.e. you want to stack chords) then you could use the standard "Toggle" switch mode with no switch groups.
Transmit means that the switches will only transmit their state to other switches, and not listen to whether other switches change their state. Receive means they will not tell the other switches in the group their state, but will respond to any changes in state from other switches. We'll leave the settings as Transmit & Receive
Respond To sets what kind of switches states will trigger the switch to act on its Response setting. So if the switch is set to Receive (i.e. listen to) the states of other switches, you can filter whether it listens to On states, Off states, or both - On + Off. We'll set ours to On + Off.
Response sets what the switch will do when it is sent a state change from another switch. The options are complex and I won't explain them all here for the sake of time, but we want our chord to turn off when we press a new switch, so we'll choose Off. This will make our switches turn off when another switch turns On or Off.
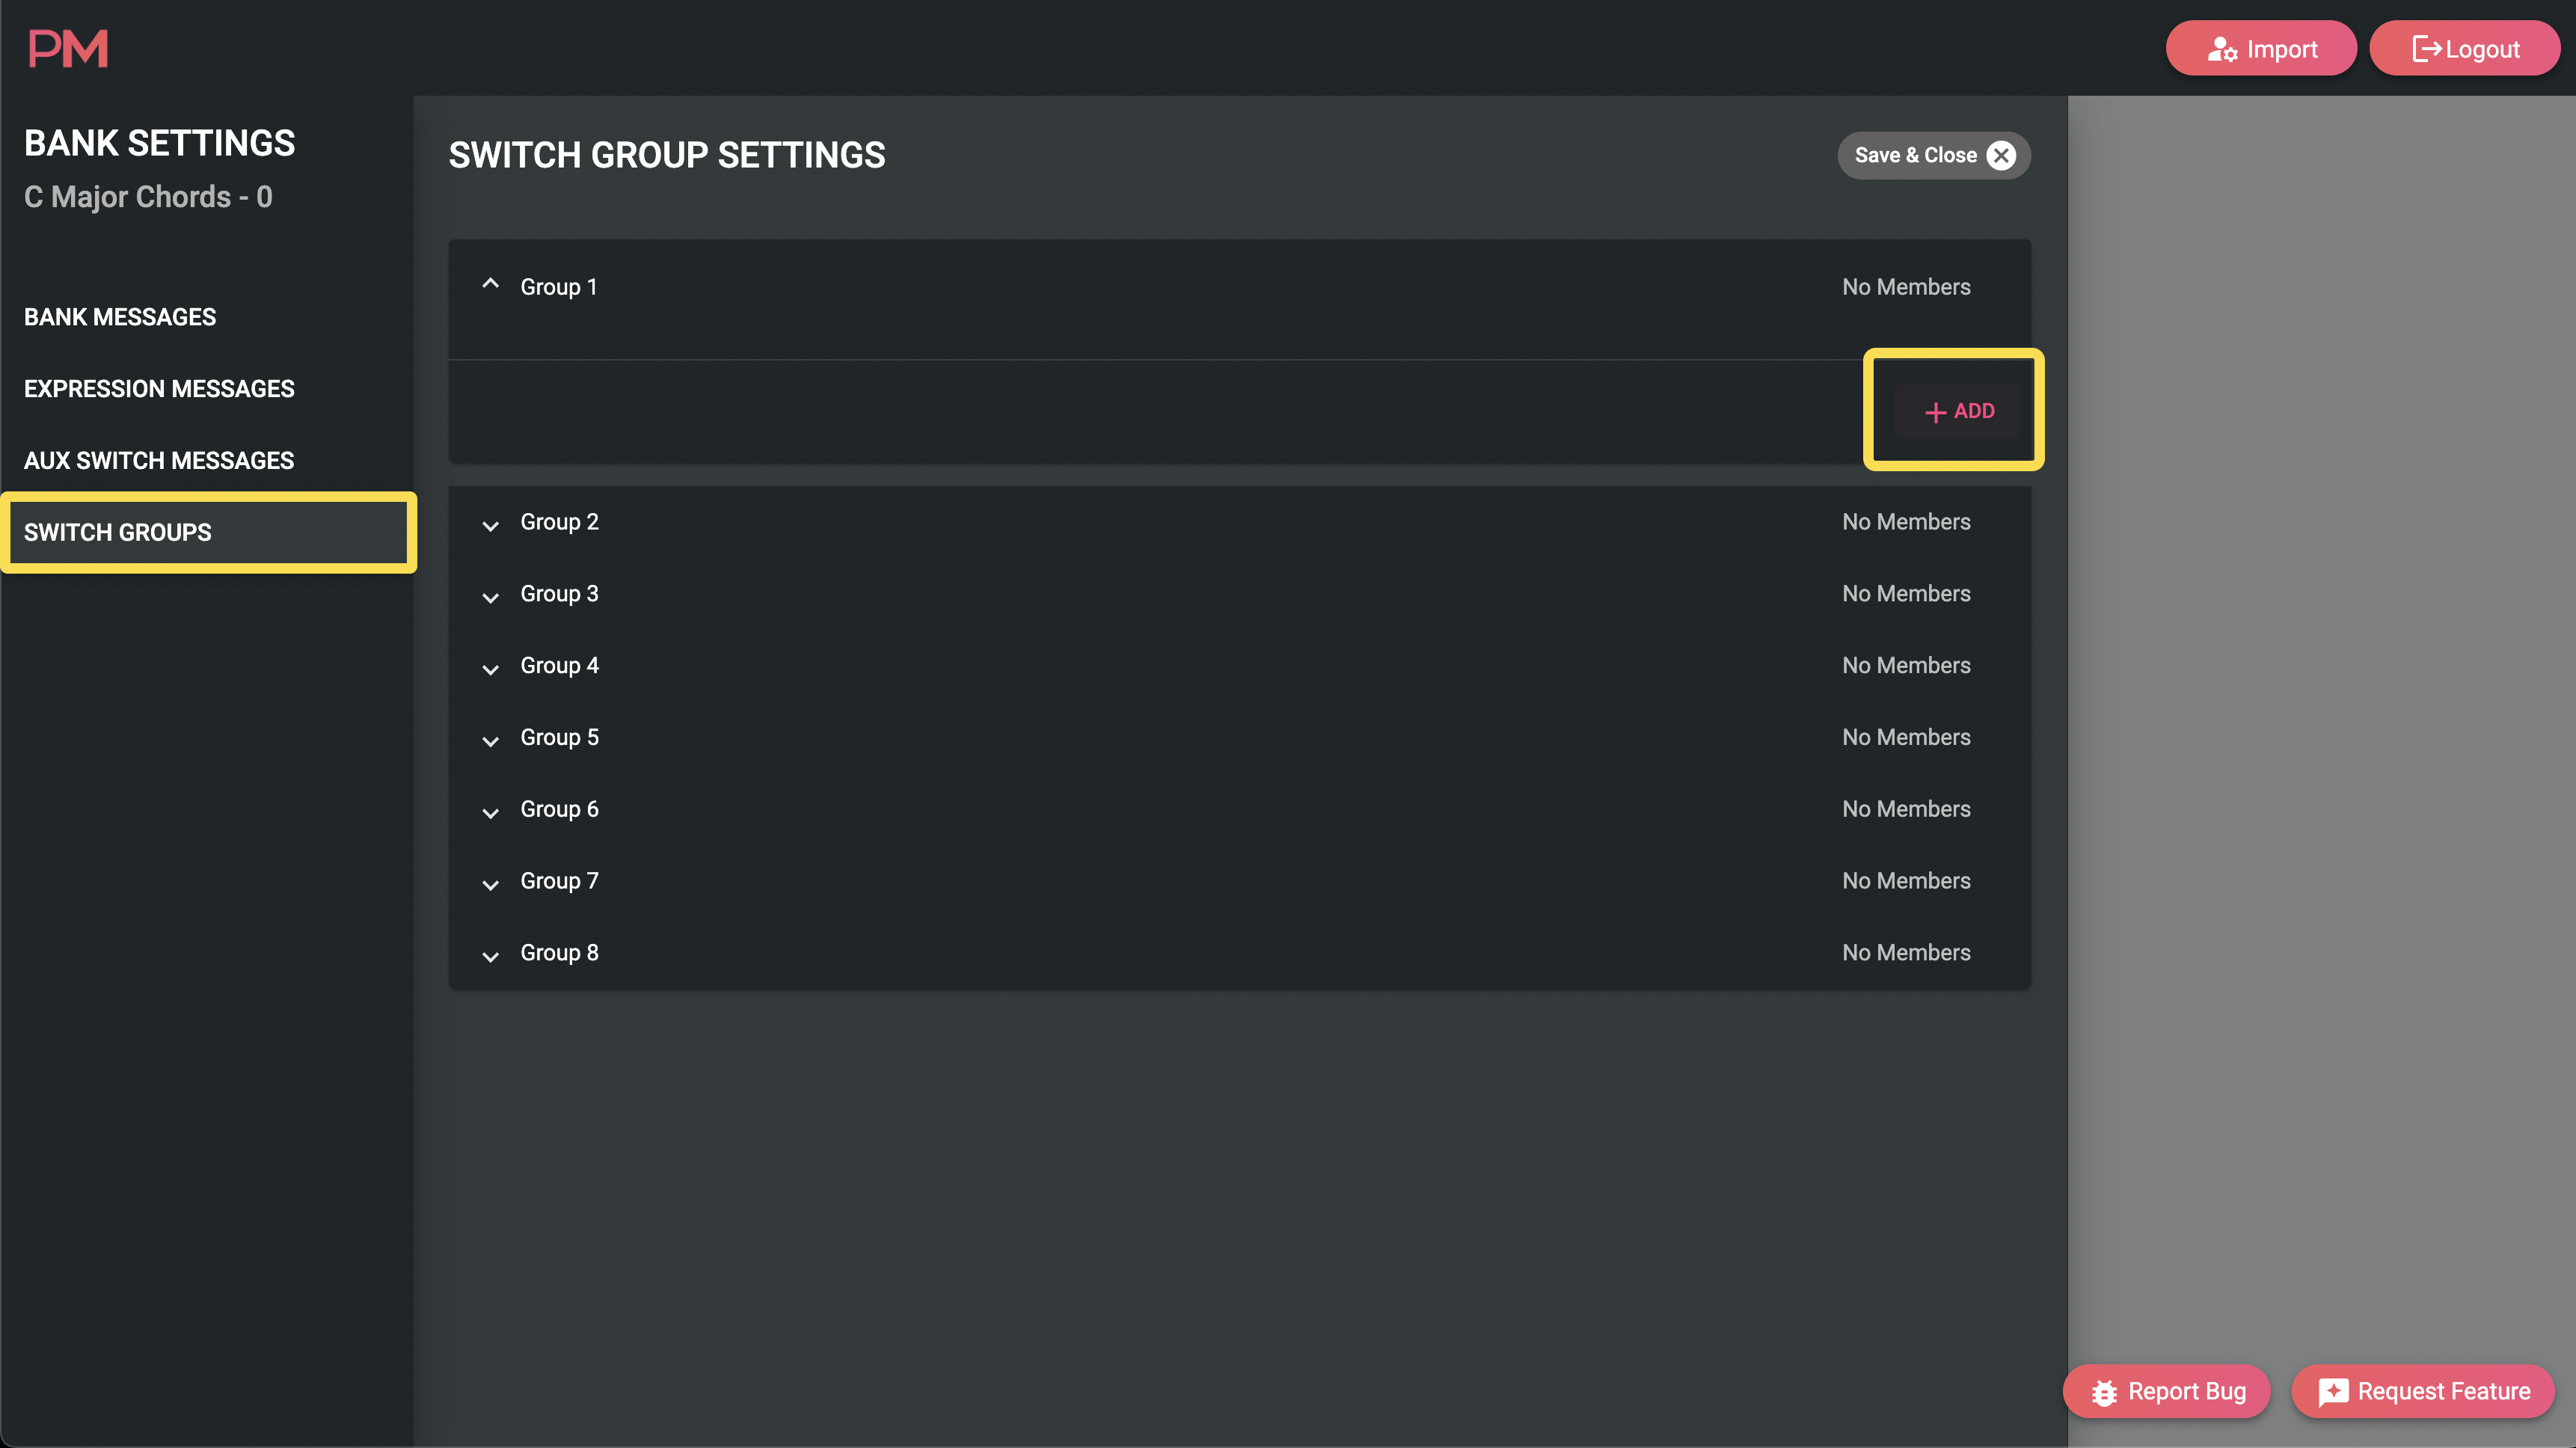
See the screenshots below for where to find the Switch Group settings and how to set them. Just keep "add"-ing a new Group Member until you've done all the 6 primary switches.

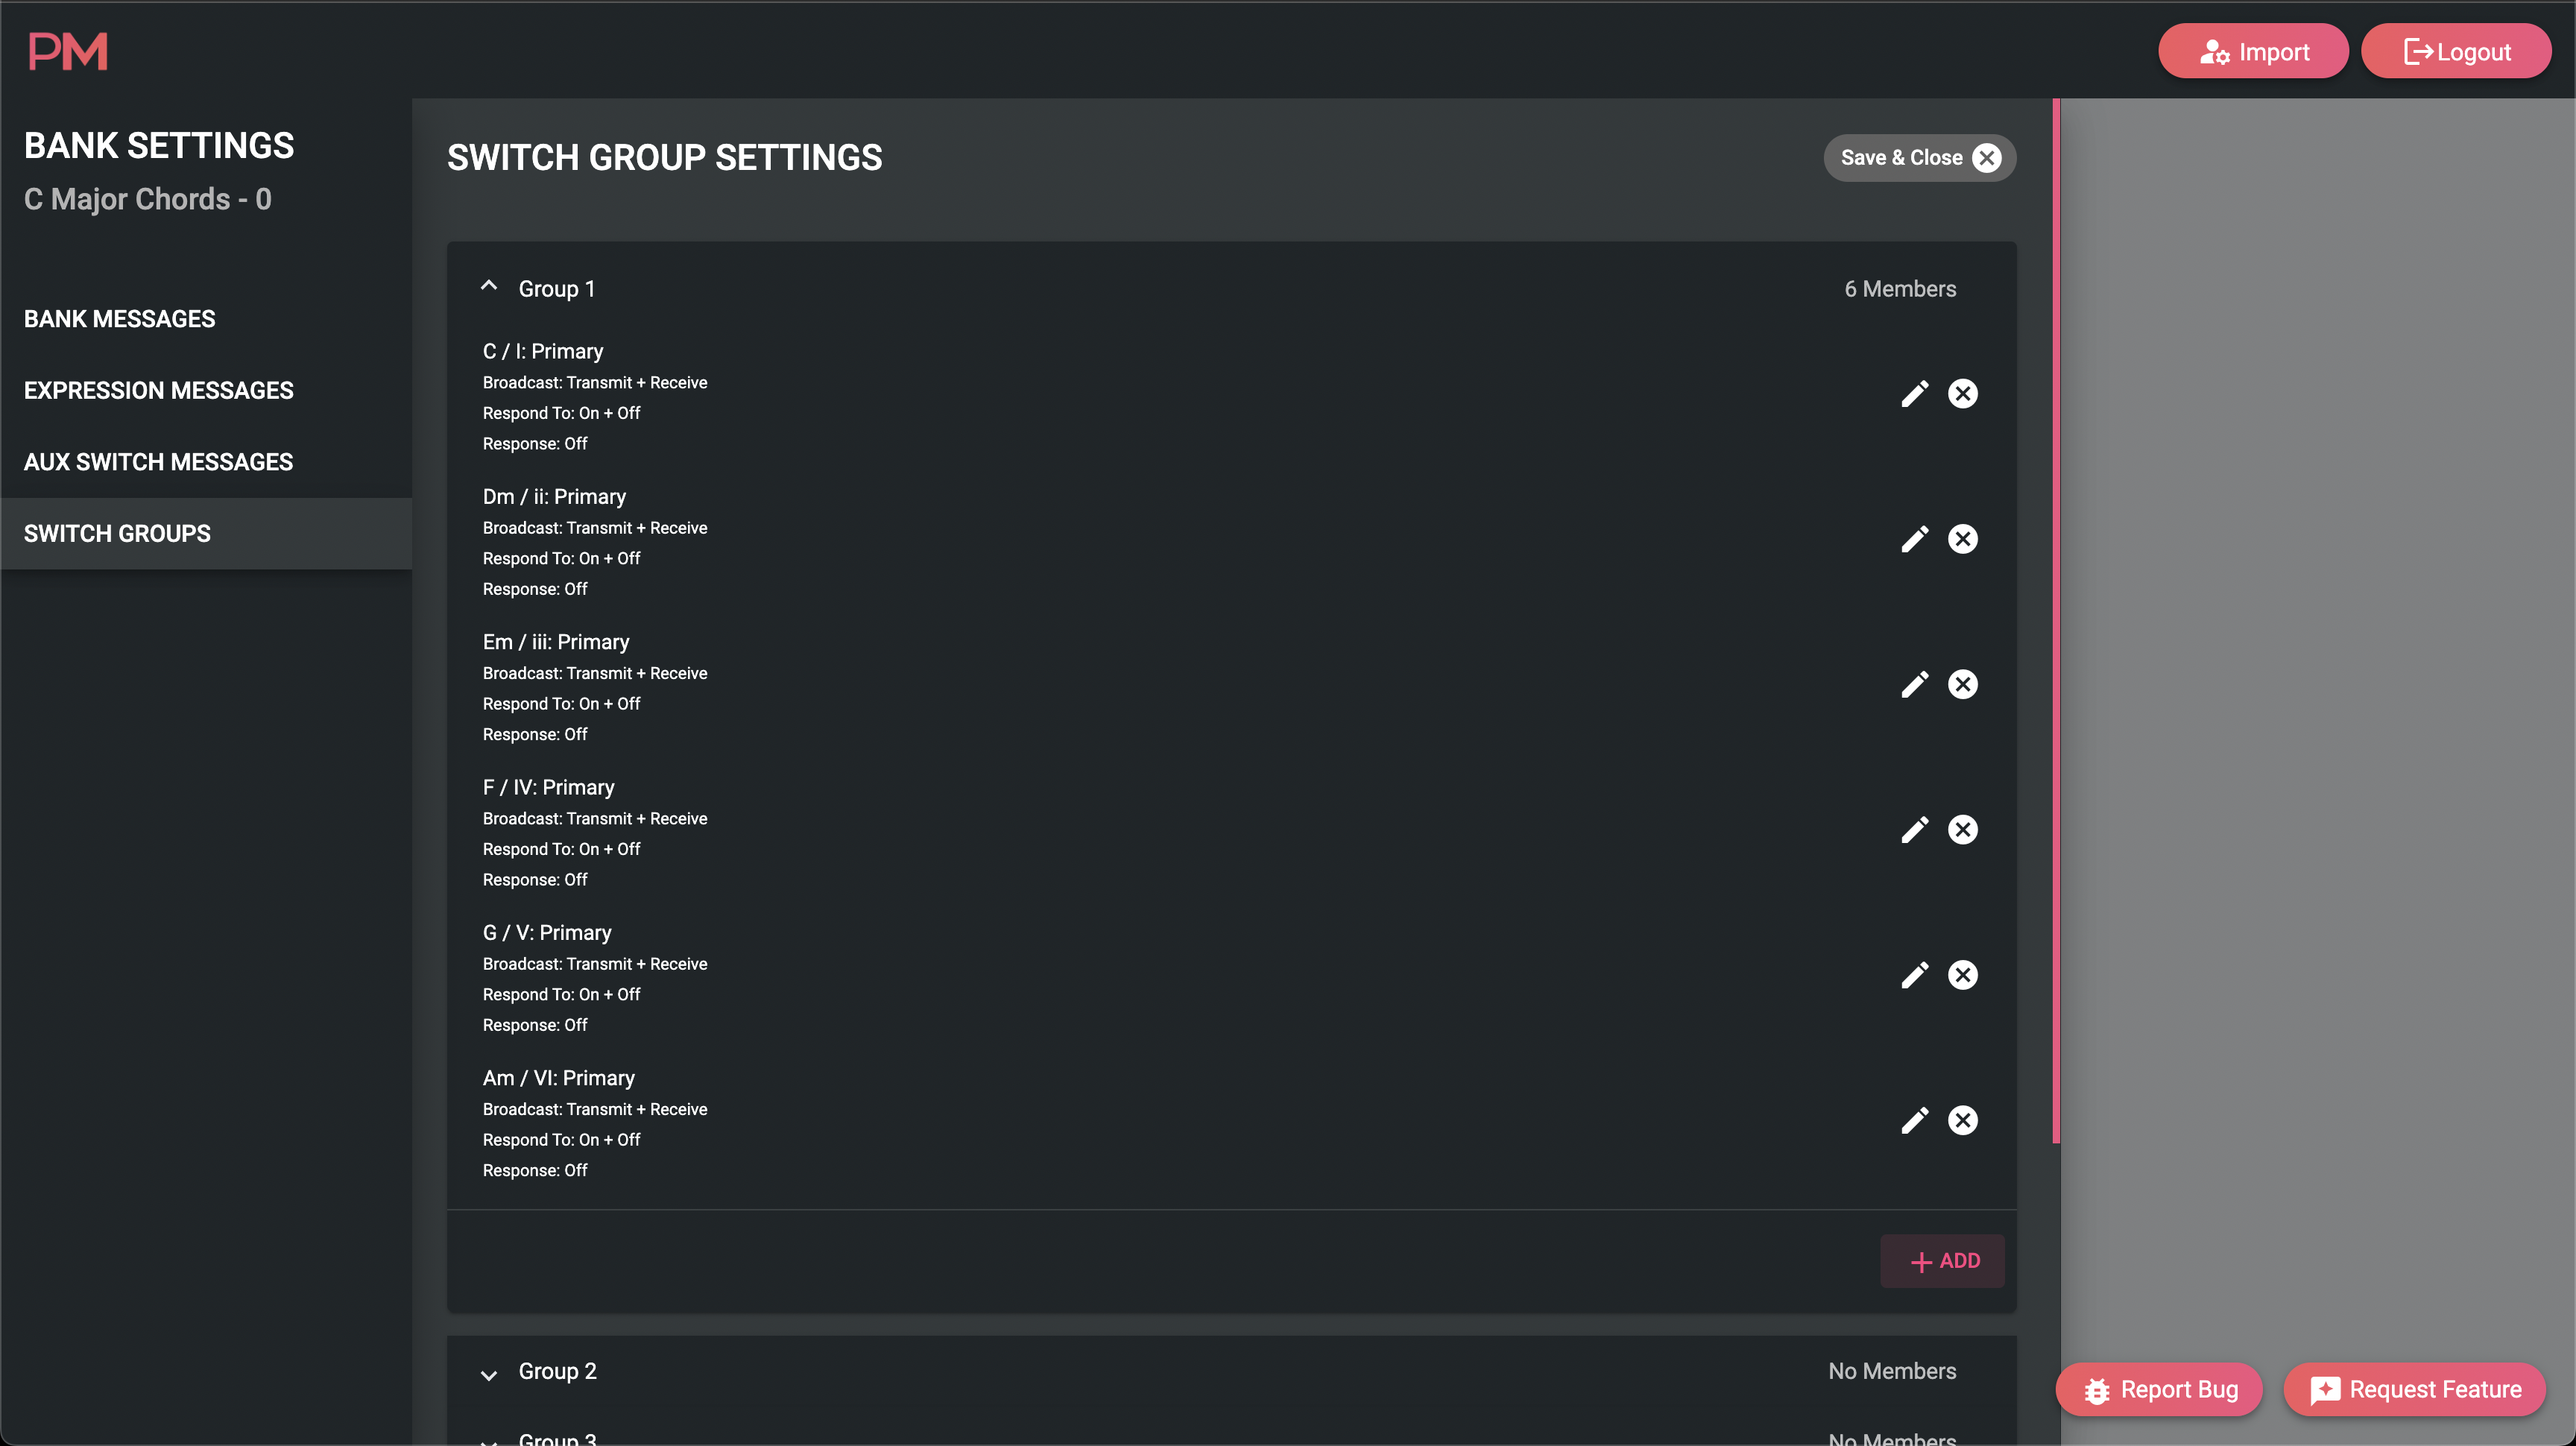
Your Switch Group should look something like the screenshot below:
Step 3: MIDI
Now we have working switch groups, labels, but no actual chords! Go ahead and add your MIDI messages to each switch in the Toggle On and Toggle Off message stacks on each switch. Add Note On messages in the Toggle On stack, and the corresponding Note Off messages in the Toggle Off stack.
Here's an example of how Switch 1 message stacks look for this example:
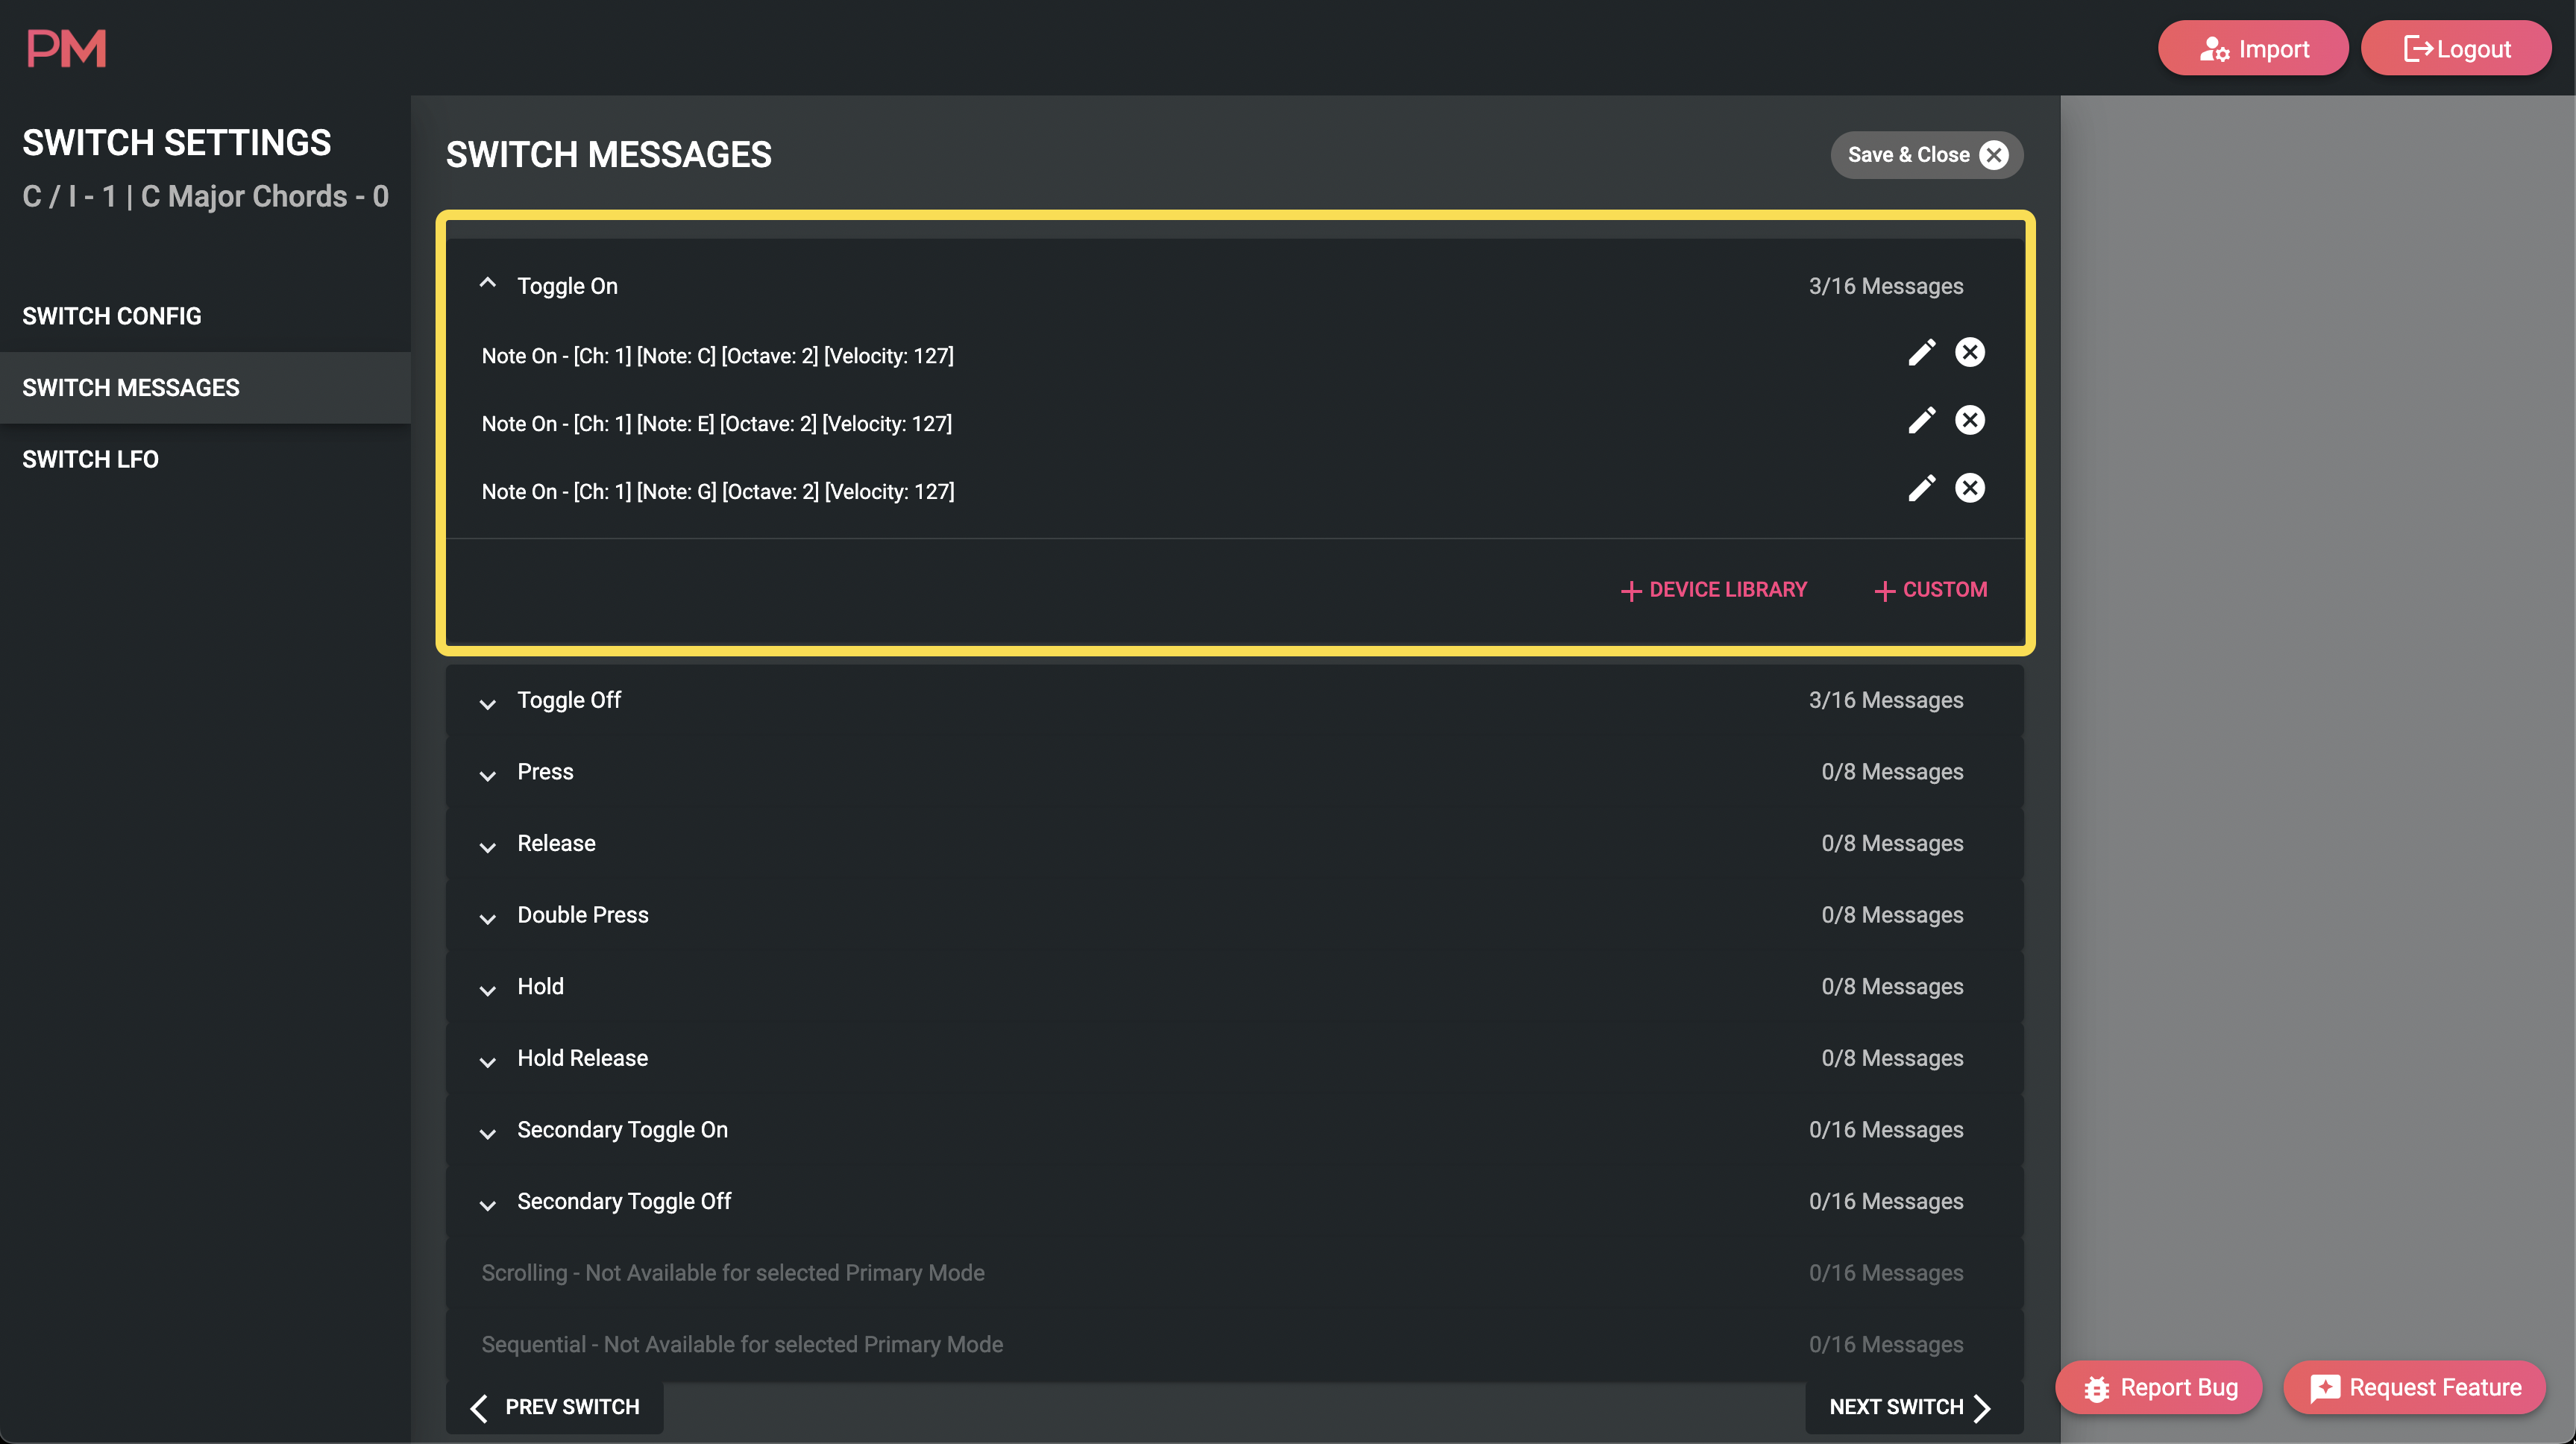

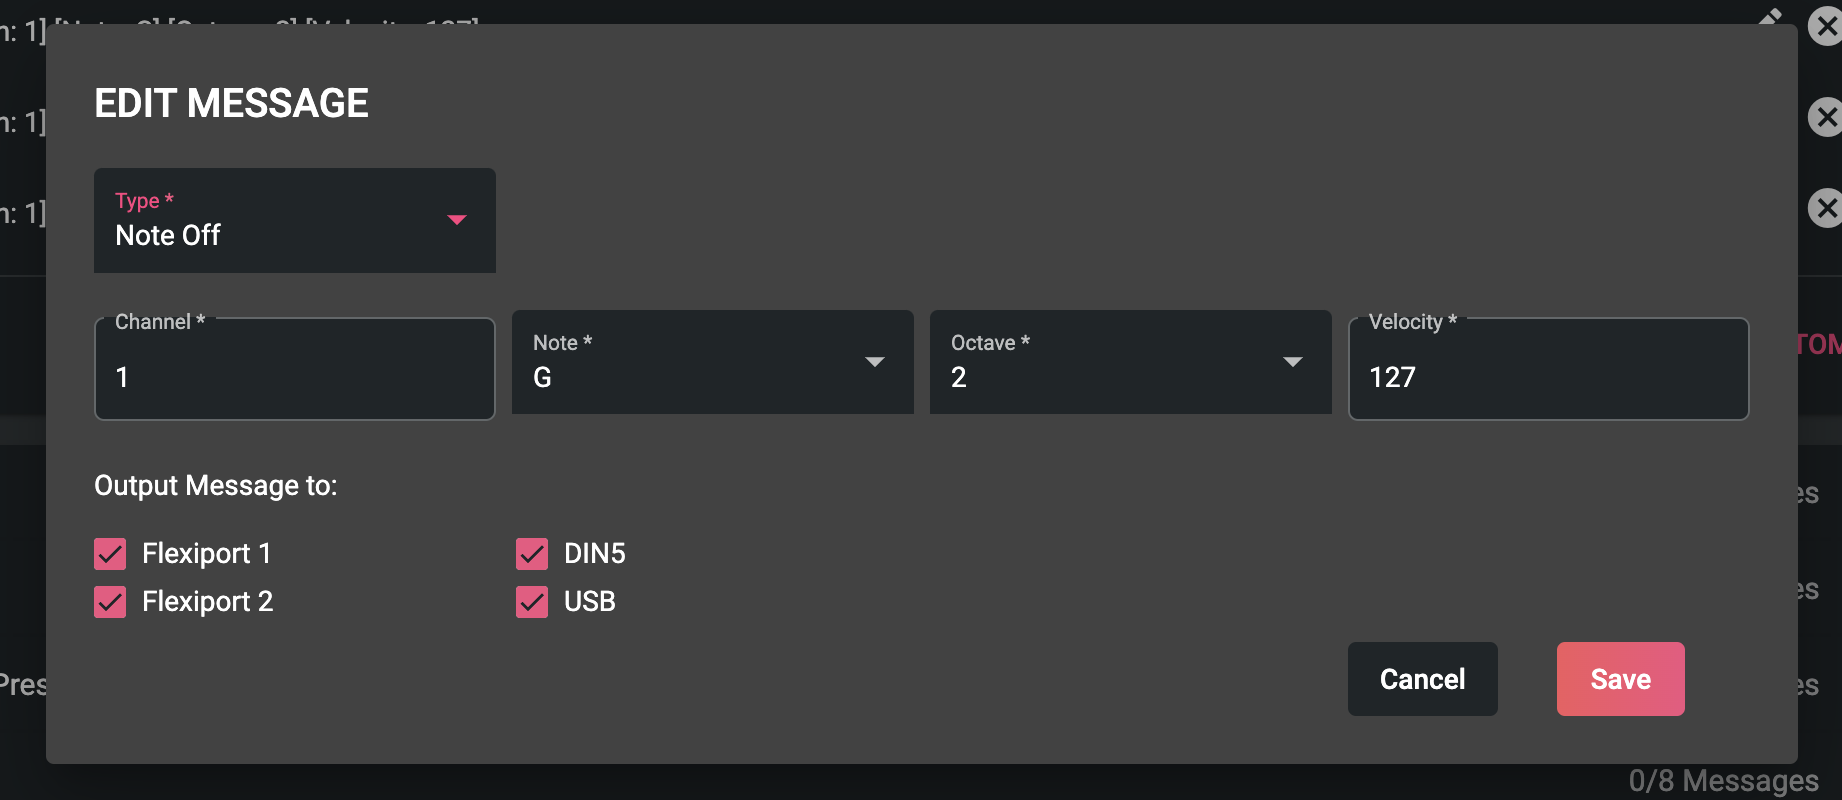
After you've added all the Note On/Off messages to the switches, you will be sending Note On messages with every switch toggle, and Note Off messages when the switch gets turned off. You now have a chord generator which will hold the chord on, until you toggle the switch off again.
If you need help with more advanced configurations, we're always happy to help out and there are lots of dedicated MIDI geniuses in our community. You can post in our Forums on Discord, or just engage in light MIDI-related chit-chat. Join by clicking this link, or you can preview the community (without the forums at the moment, sorry) at the "communities" tab in the navigation menu on this website.
The finished product of this tutorial is now available as a template you can load in our Web Editor. The tutorial is still useful for the sake of understanding how the template works, and to spark creative ideas for other application of the same features.